Pages

Thursday, January 27, 2011

Cookies for Breakfast

Cooking with my Kid is another food blog with a number of yummy recipes (all kid-help friendly) and I'd recommend it to any friends/readers with children interested in helping out. 

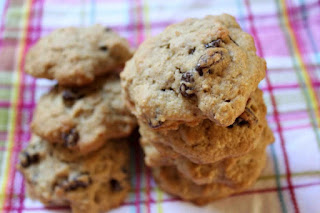
One of the recipes that I think is just fantastic is Breakfast Cookies...I mean who amongst us doesn't have our inner child begging for a cookie in the morning (now and then). So why not bake muffin-like cookies and indulge in a healthy way.

Breakfast Cookies

Prep Time: 15 mins Cooking Time: 12 mins

Ingredients:
1 cup whole wheat pastry flour
1/2 cup all purpose flour
1/2 teaspoon baking soda
pinch of salt
1 teaspoon cinnamon
1/2 stick butter
2 1/2 cups applesauce
1/3 cup brown sugar
1/3 cup granulated sugar
1 egg
1 teaspoon vanilla extract
1 cup oatmeal
1 cup dried cranberries

Preheat the oven to 400 degrees. In a medium bowl whisk together flours, baking soda and salt. Set aside. Cream butter and sugars in an electric mixer until fluffy. Mix in egg and vanilla. Add the flour mixture and mix until JUST blended. Do not over mix. Fold in the applesauce, oats and dried cranberries. Scoop out batter onto a greased cookie sheet (I highly recommend using a Silpat), flatten slightly and bake for 12 mins or until toothpick comes out clean. These come out tasting more like muffin tops than cookies. That’s what makes them great! Makes about 2 dozen.

Breakfast Cookies II


Ingredients:
1 cup whole wheat pastry flour
1/2 cup all purpose flour
1/2 teaspoon baking soda
pinch of salt
1 teaspoon cinnamon
1 stick butter
1/3 cup brown sugar
1/3 cup granulated sugar
1 egg
1 teaspoon vanilla extract
1 cup oatmeal
3 mashed bananas
1 cup raisins

Preheat the oven to 400 degrees. In a medium bowl whisk together flours, baking soda and salt. Set aside. Cream butter and sugars in an electric mixer until fluffy. Mix in egg and vanilla. Add the flour mixture and mix until JUST blended. Do not over mix. Fold in the banana, oats and raisins. Scoop out batter onto a greased cookie sheet (I highly recommend using a Silpat), flatten slightly and bake for 12 mins or until toothpick comes out clean. Store these as you would muffins so they remain moist.

Wednesday, January 26, 2011

NOODLES!!!

I love the New York Times food section I really do. It always makes me sad to see such yummy food thousands of miles away...so I do what I normally do - find a substitution in my city and post the news article on my food blog.

Today is no different.

Today I read an article called "The Long Pull of Noodle Making". Since it's too long to just post I'm linking it here.

I am, however, going to share excerpts from the article and a video of the Noodle Master.

*     *     *

The Long Pull of Noodle Making
by Julia Moskin

"In an open kitchen in NoLIta, two solemn young men work together in virtual silence up to 16 hours a day, their destinies yoked by noodles.

Michael Hodgkins is a stern, passionate chef from upstate New York, with a dedication to local and organic ingredients. Huacan Chen is an aspiring entrepreneur from Fuzhou in southern China, with a skill that happens to be seriously marketable in New York at the moment: he knows how to spin out endless skeins of la mian, smooth, springy hand-stretched noodles, using nothing but a countertop and his hands...."

"....As the dough came together and softened, Mr. Chen divided the lump into baguette-size lengths and twisted each one tight like cheese straw. When the twists were done, he held each weighty length in his hands, letting its belly fall toward the ground, then twirled the ends together as if making a pretzel. After several repetitions, he broke off a handful of dough and began to pull it long, doubling the dough around his left hand and spreading his arms wide apart in a few quick moves that produce a web, like a full-body game of cat’s cradle. A few extra pulls produce noodles that are xi, or thin; thick noodles are called cu.

When the noodles come out, perfectly tender, Mr. Hodgkins — who worked most recently under the chef Shea Gallante — goes to work. (Since Mr. Chen speaks no English and Mr. Hodgkins no Chinese, they communicate — minimally — in basic Spanish and hand signals.) Mr. Hodgkins added the broth and highly untraditional toppings like Romanesco broccoli roasted in mustard oil or turnips braised in daikon broth..... "

*     *     *


Recipe: Chocolate Chip Chili

I love getting new recipes, so really it's no surprise that I subscribe to a number of food blogs, etc. Every morning The Stir: Recipe A Day has a new recipe or food suggestion. Yesterday was putting Nutella on popcorn, the day before that was Chicken Fingers that Jamie Oliver would approve of, and so forth.

Today's recipe was for Chocolate Chip Chili! One of the reader comments was "Anyone who is a fan of Mexican mole sauce will enjoy chocolate spiked chili."....which I am so perhaps I'll love it too.

I'm going to say this now - I have not tried this myself. But the chili sounds like a standard and really it's just adding the chocolate chips that's out of the ordinary. I can honestly say though, next time I make a pot of homemade chili I'm breaking up a bar of chocolate into it (baker's chocolate not a hershey's bar).

Chocolate Chip Chili 


1 lb. sweet Italian sausages
2 lbs. lean ground beef
2 medium onions, peeled and chopped
4 cloves garlic, peeled and minced
2 tablespoons olive oil
2 teaspoons ground cumin
1/2 teaspoon ground coriander
1 teaspoon ground cinnamon
1 teaspoon dried crushed chillies
1 medium can tomato purée
3 x 15 oz cans red kidney beans, drained
3 x 15 oz cans chopped tomatoes
1/2 cup dark chocolate chips
2 cups water
Salt & pepper to taste

Brown meats in olive oil in large pan on medium heat, using a sturdy wooden spoon to break them up.

Add onion and garlic, cook for a few minutes until soft, then add the cumin, coriander, cinnamon, and dried chillies. Stir well to combine.
Stir in the tomato purée and chopped tomatoes. Add the water and bring the chili to a boil.

Once it’s started bubbling, sprinkle the chocolate chips and the kidney beans over the chili, and give it a good stir.

Transfer it to a Crock-Pot for up to 7 hours.

Season with salt & pepper before serving. Top with your favorite chili toppings -- sour cream, shredded cheese, green onions, etc.

Thursday, January 20, 2011

Recipe: Brooklyn Bowl Fried Chicken

I came across this article today and I had to post it. I know that getting your kids to try new things is a challenge and an on going battle for many parents. While I don't have children of my own I do live with people who can get very stuck in their taste-bud-ways. I'm making the chicken curry later this week and had to sweet-talk and press to get it on the menu list.

I think what I liked most about this food blog/article (make sure to read it, super cute) was that the author's son would consider his favorite foods either sushi or Brooklyn Bowl Fried Chicken - even though he's on a "Chicken Nugget" kick.

The recipe I'm including is the Brooklyn Bowl Fried Chicken. I'm hopefully going to slip it onto the dinner menu for my family one of these days (currently in my house there is only ONE way to make fried chicken and that's Grandma's Way).


*     *     * 
Brooklyn Bowl Fried Chicken

Vegetable oil, for frying
4 large egg whites
½ cup matzo meal, or matzo crackers crushed with a rolling pin
½ cup all-purpose flour
1 medium chicken (about 3 pounds), cut into eight pieces (2 legs, 2 thighs, 4 breast pieces; save wings for stock)
Fine sea salt and freshly ground black and white pepper
1 teaspoon Cajun seasoning (recipe follows)
Honey, for serving.

1. Fill a large pot with oil to a depth of about 3 inches. Heat the oil over medium-high heat until a deep-fat thermometer reads 375 degrees.

2. Meanwhile, whisk the egg whites in a large, shallow bowl. In a separate shallow bowl, combine the matzo meal and flour. Keeping the dark meat and the white separate, dip each chicken piece in egg white and let excess drip back into the bowl. Then roll each chicken piece in the matzo mix, and tap off excess.

3. Carefully lower the chicken thighs and drumsticks into the oil. After 3 minutes, carefully add the breast pieces. (Keep the oil at 375 by adjusting heat as necessary.) Fry until dark gold, about 10 minutes more. Transfer the fried chicken to a paper-towel-lined plate. Sprinkle immediately with salt and pepper, then coat the pieces with the Cajun seasoning. Serve the chicken with honey, for dipping.

Serves 4.

Cajun Seasoning

¼ cup kosher salt
¼ cup paprika
1 tablespoon fine sea salt
1 tablespoon freshly ground black pepper
1 teaspoon garlic powder
½ teaspoon onion powder
½ teaspoon sugar

Combine all ingredients and store in a covered container.
Makes about ¾ cup.
Recipes adapted from “Bromberg Bros. Blue Ribbon Cookbook,” by Bruce Bromberg, Eric Bromberg and Melissa Clark.

Wednesday, January 19, 2011

Caramelized Corn

Caramelized Corn With Fresh Mint

Time: About 30 minutes

4 to 5 cups fresh corn kernels, white or yellow (from about 12 cobs), or two 16-ounce bags frozen white corn
1 stick (4 ounces) unsalted butter
1/2 cup chopped fresh mint
Salt.

1. If using frozen corn, drain between layers of paper towels until thawed, about 30 minutes.

2. In a wide skillet, melt half the butter over high heat. Add half the corn and cook, stirring often, until golden and browned (kernels may begin to pop), about 10 minutes. Stir in half the mint and sprinkle with salt. Transfer to a serving bowl. Repeat with remaining corn, butter, mint and salt.

Yield: 10 to 12 servings.

*     *     *

I know it seems simply and easy enough but when I think of how many times we just boil ears of corn or (dirty little secret exposed here) heat threw some frozen corn....it's nice to remember that in only a few minutes we can still add a little flavor and flare to vegetables.

Recipe: Roasted Cauliflower with Lemon Butter

I'm not a big fan of (overly) cooked vegetables. Creamed spinach is one of the least appetizing foods out there in my opinion. Even steamed veggies can sometimes go to long and then are just mush.

I prefer a little *snap* to my vegetables and one way that I love is to roast/bake them instead. You have control over how long you roast them for and even if the inside is soft the outside crisps up. I've done something similar to this NY Times recipe with broccoli (sans the sage salt) and the family just loved it 2 Thanksgivings ago.

Roasted Cauliflower With Lemon Brown Butter and Sage Salt

Time: About 1 hour

1/4 cup olive oil
1/4 cup sage leaves, loosely packed
1 tablespoon coarse salt, more for tossing
3 heads cauliflower, cut into florets
About 1 teaspoon table salt
6 tablespoons unsalted butter
1 lemon, zest finely grated.

1. Heat oil in a small pan until rippling. Add sage and cook, stirring, just until crisped, about 2 minutes. Lift out sage and drain on paper towels; transfer oil to a large bowl. Let sage cool and crumble with fingers into a small bowl. Stir in coarse salt and set aside.

2. Heat oven to 375 degrees. Place roasting pan with an inch of water in oven bottom. Add cauliflower to bowl with oil, add about 1 teaspoon table salt, and toss gently until coated. Spread out on two large baking sheets. Bake until browned, 20 to 30 minutes.

3. Melt butter in a small pan over medium heat. When foam subsides, watch closely and stir often. When white solids are brown and butter smells toasty, turn off heat, squeeze in juice of lemon and stir well.

4. Transfer cauliflower to a bowl, pour butter over, and add lemon zest. Add half the sage salt and toss. Taste and season with remaining salt as needed.

Yield: 10 to 12 servings.

Tuesday, January 18, 2011

Recipe: Butter Tarts

So I love making pies and tarts....and really anything mini is just too damn adorable. So when I saw these Butter Tarts in the LA Times I fell in love. This past Thanksgiving I revised a Butter Pie and turned it into a Brown Sugar Tart...these are extremely similar in ingredients and I'm sure either recipe could be altered, merged or adapted to the other. 

Butter Tart Minis

Total time: 45 minutes, plus 2 hours chilling time
Servings: 40
Note: Make the filling while the dough chills.

Tart shells
1 1/4 cups unbleached white flour
1 teaspoon salt
1 tablespoon sugar
7 tablespoons unsalted butter, well chilled
1 tablespoon milk
1 egg, slightly beaten

1. Place the flour, salt and sugar in the bowl of a food processor and pulse a few times to combine. Cut the butter into small pieces and drop them into the flour mixture. Process a few seconds, until the mixture resembles coarse meal. (If you don't have a food processor, you may do this using a pastry blender or two forks.)

2. Combine the milk and egg and add to the flour mixture. Pulse 5 times, then process until the dough forms into a large ball. (If you do this by hand, make a well in the middle of the flour, add the egg and milk and use a wooden spoon to combine, then knead until smooth.) Wrap the pastry in a cloth or plastic wrap and chill for at least 2 hours.

3. Roll out the dough on a lightly floured board to a one-eighth inch thickness and cut out rounds with a 2 1/4 -inch round biscuit cutter. Use scraps to form another ball, roll out again, and cut out more rounds.

4. Push a round into a 2 1/4 -inch tart tin, pressing it gently into the bottom and corners. Repeat with the remaining dough, working in batches if necessary. Makes about 40 (2 1/4 -inch) tart shells.

Filling and assembly
6 tablespoons butter, melted
1 cup packed brown sugar
1/2 cup maple syrup
2 eggs
1/4 teaspoon salt
2 teaspoons mild vinegar, such as Champagne vinegar
1/2 teaspoon vanilla extract
2/3 cup chopped walnuts
40 unbaked miniature tart shells

1. Heat the oven to 400 degrees. In the bowl of an electric mixer, mix the butter, sugar, maple syrup, eggs, salt, vinegar and vanilla. Stir in the walnuts. Stir the filling again as needed if it separates.

2. Spoon a scant 1 tablespoon of filling into each unbaked tart shell. Reduce the oven temperature to 375 degrees and bake the tarts for approximately 15 to 17 minutes.

Recipe: Meringue Layer Cake

Time: 2 hours, 45 minutes, largely unattended

Servings: 12 to 16

Note: Adapted from "The Gourmet Cookbook, Volume 1." and posted on the LA Times. Ice this cake immediately after you make the icing and serve soon after preparing.

Meringues
1 tablespoon butter (for parchment)
2 tablespoons flour (for parchment)
8 egg whites
1 cup plus 2 tablespoons sugar
3 tablespoons flour
1/2 cup ground almonds

1. Heat the oven to 350 degrees. Line 3 baking sheets with wax paper or baking parchment. Trace 2 circles on each of two baking sheets, 8 inches in diameter, with 1 inch between them. On the third sheet, trace one circle. Brush the paper with melted butter and flour generously, shaking off the excess.

2. Beat the egg whites to soft peaks. Gradually beat in the sugar and continue beating until stiff and glossy. Fold in the flour and the ground almonds.

3. Divide the egg white mixture among the circles on the baking sheets, taking care to spread it evenly to the edges of the circles as thin spots will be fragile.

4. Place the sheets in the oven, reduce the heat to 250 degrees and bake for about 25 to 35 minutes, or until the layers are just beginning to color. Reduce the heat to 200 and bake for two more hours.

5. Remove the meringues and cool briefly so they can be handled. Peel the parchment paper from the bottom of the disks, trying not to break them but not minding if you do -- icing will conceal it.

Icing and assembly
6 ounces bittersweet chocolate
1 1/2 cups butter, softened
3 egg whites
1/2 cup sugar
3 tablespoons cocoa

1. As the meringues cool, make the filling. In a double boiler, melt the chocolate and butter together; remove from heat.

2. Beat the egg whites until foamy and soft but not until stiff peaks form. Gradually beat in the sugar and cocoa and then the melted chocolate and butter.

3. Put a meringue disk on a good pastry dish. Coat it with icing. Place a disk on top of the icing. Ice. Repeat with the remaining disks, finishing with a layer of icing. Serve immediately. The Italian walnut liqueur Nocino would be the ideal accompaniment.

Recipe: Traditional Eggs Benedict

I must be craving eggs right now. Poached eggs. Eggs Benedict. I think I needed more than just a yogurt for breakfast this morning. 

As I mentioned in the Spring Herbed Poached Egg entry a beautifully poached egg really is breakfast nirvana for me. So it shouldn't be a surprise that I'm also a huge fan of Eggs Benedict. Often times if a new restaurant has Eggs Benedict on their menu that's what I'll order. Out of both testing to see if their chefs/cooks can create something so simple as a poached egg but also out of sheer desire and no will. 

I've had Benedict's with salmon, avocados, chicken, tomatoes, on various types of bread and with variations of hollandaise sauces.One of my favorite restaurants in San Diego, The Parkhouse Eatery, has the BEST BENEDICT I've ever had. Instead of English Muffins it sits on top of grilled focaccia. Instead of Canadian Bacon, they use Applewood smoked bacon then they finish it off with tomatoes, an avocado hollandaise and of course 2 perfectly poached eggs.

While the recipe from the LA Times (below) is for a traditional Eggs Benedict I think you can see where the free-style and cooks-creativeness can easily come into play. After all I always start with the basics and then work my way up to creative genius.

Eggs Benedict:

Total time: 20 minutes
Servings: 6

Hollandaise sauce
4 egg yolks
8 tablespoons (1 stick) butter, cut into three parts
Juice of 1/2 lemon
Salt
Pepper

1. Combine the egg yolks in the top of a double boiler over simmering water. Stir in the cubes of butter, piece by piece, stirring constantly. Remove from heat as the last piece melts.

2. Add the lemon juice. Taste, season. If the sauce curdles, add a chip of ice and stir.

Eggs and assembly
12 strips Canadian bacon
6 English muffins
12 eggs
Hollandaise sauce

1. Grill the bacon, reserve in a warm oven. Split and toast the muffins, (allowing for some more cooking while they stand). Reserve in a warm oven. Heat 6 plates in the oven.

2. Fill a broad-faced frying pan half full of water, and bring the water to a simmer. Carefully crack the eggs into the water a few at a time. Poach the eggs (3 minutes for soft runny eggs), trimming away any straggly whites. When the eggs are almost cooked, using a slotted spoon, remove them to warm water and continue poaching until all the eggs are done.

3. Arrange the muffin halves on plates. Cover each with a slice of bacon, then an egg, then a generous spoonful or two of hollandaise sauce. 

Recipe: Spring Herbed Poached Egg

I love poached eggs. There sometimes is nothing sweeter and more delicate that a perfectly poached egg.

A poached egg can make or break a restaurant for me. They really aren't hard to make but once you have started to over cook it there's no going back. There's no way to save it.

While this recipe (which I found in the LA Times) has the eggs eaten on top of watercress with heirloom tomatoes I could just eat them plain. 

Spring Herbed Poached Eggs:

Servings: 4

Nonstick cooking spray, optional
2 teaspoons Dijon mustard
2 teaspoons Sherry vinegar
1 teaspoon lemon juice
1 teaspoon minced shallot
3 tablespoons olive oil
2 tablespoons canola oil
Salt, pepper
4 cups watercress leaves
8 eggs
1 tablespoon minced fresh dill
1 tablespoon snipped chives
1 tablespoon minced chervil
8 baby small plum tomatoes

1. Spray the bottom of a large skillet with nonstick spray, or use a nonstick skillet. Fill the skillet 3/4 full with water and bring to a boil.

2. Meanwhile, whisk together the Dijon mustard, Sherry vinegar and lemon juice until blended. Stir in the shallot. Slowly whisk in the olive and canola oils until the dressing thickens and is emulsified. Stir in salt and pepper to taste. Set aside. Toss the watercress leaves with the dressing and divide among 4 plates.

3. Reduce the boiling water to a simmer. To poach the eggs, work with 2 at a time. Crack the first egg into a small bowl, then carefully pour into the water; repeat with the second egg. Cook until the whites of the eggs are set and cooked through, about 3 to 4 minutes, then remove them from the water with a slotted spatula. Repeat with the remaining eggs. Place 2 eggs atop each plate of watercress. Sprinkle the eggs with salt and pepper to taste, then the dill, chives and chervil. Garnish with the tomatoes.

Monday, January 17, 2011

Recipe: Accordion potatoes with fresh rosemary

Accordion potatoes
Total time: 1 hour, 15 minutes
Servings: 6

6 baking potatoes, about 2 pounds total, scrubbed
2 tablespoons olive oil
1/2 tablespoon sea salt
1 bunch fresh rosemary
Shredded Cheddar cheese for sprinkling, optional

1. Heat the oven to 400 degrees.

2. Put a potato on a cutting board and lay a wooden spoon next to it. Cut 8 or 10 slices down through the potato until the knife reaches the spoon handle; this will leave the base of the potato intact. Repeat with all potatoes.

3. Place the potatoes in a roasting pan, drizzle with the oil and sprinkle with the salt. Place a sprig of rosemary between each slice. Bake until tender, 40 or 50 minutes.

4. For serving, remove the rosemary springs and replace with fresh ones, or sprinkle with shredded cheese.

Recipe: Lemon Aioli

I'm a serious sucker for asparagus (too bad it's currently $4/lb here in Portland) and would eat aioli on just about everything (if it didn't mean I'd have clogged arteries and die before my next birthday) - so when I saw this LA Times recipe for a Lemon Aioli and they should it on asparagus

*droooool* I had to share.

Lemon aioli
Total time: 10 minutes
Servings: 4 to 6

Note: This can be made in a food processor rather than with a mortar and pestle but not in a blender, which will leave the garlic too bitter.

4 cloves very fresh garlic
1/2 teaspoon coarse sea salt
1 egg yolk, at room temperature
Juice of 1 lemon
3/4 cup extra-virgin olive oil
Zest of 1 lemon
Freshly ground white pepper to taste

1. Smash the garlic cloves with the flat side of cleaver or chef's knife. Remove the peel and place the pulp in the bottom of a large mortar and pestle. Add the sea salt. Mash with the pestle into a smooth paste. Add the egg yolk and mix with the pestle until well incorporated. Add the lemon juice and mix well.

2. Using a small whisk, continue mixing while very slowly dribbling in the olive oil. Whisk until creamy and emulsified. Whisk in the lemon zest. Season with the white pepper to taste and additional salt if needed. Serve with asparagus, artichokes, shrimp, haricots vert or anything springy.

Each of 6 servings: 254 calories; 1 gram protein; 2 grams carbohydrates; 0 fiber; 28 grams fat; 4 grams saturated fat; 35 mg. cholesterol; 193 mg. Sodium

Recipe: Chicken Tagine with Chickpeas and Apricots


Ingredients:
2 tablespoons olive oil
4 skinless chicken thighs
1 large onion, chopped
1 tablespoon minced garlic
1 teaspoon minced fresh ginger
1 1/2 teaspoons ground coriander
1 tablespoon ground cumin
1 1/2 teaspoons ground cinnamon
1/2 cup chopped dried apricots (can substitute dried figs, prunes or other fruit)
1 cup chopped tomato (fresh or canned or boxed, with juice)
2 cups cooked or canned chickpeas, drained, with the liquid reserved
1 to 2 cups chicken stock, bean liquid or water, or more as needed
1/2 cup bulgur (can substitute couscous or rice)
Salt and freshly ground black pepper
1/2 cup chopped fresh parsley, for garnish.

Directions:
1. Put oil in a large, deep pot over medium-high heat. When oil is shimmering, add chicken and brown well on both sides; remove from pan and set aside. Reduce heat to medium, add onion to the pan and cook until soft, about 5 minutes; add garlic, ginger, coriander, cumin, cinnamon, dried apricots and tomato. Cook and stir just long enough to loosen any brown bits from bottom of pan.

2. Add chickpeas and 1 cup of stock or bean liquid to the pan and turn heat back to medium-high. When mixture reaches a gentle bubble, return chicken to the pan. Cover pot, turn heat to low and cook, checking occasionally to make sure the mixture is bubbling gently, for about 15 minutes or until tomatoes break down and flavors begin to meld. Stir in bulgur, adding more stock if necessary so that the mixture is covered with about an inch of liquid. Season with salt and pepper.

3. Cover and cook until the chicken and bulgur are both done, about 10 to 15 minutes. Taste, adjust the seasonings and serve in bowls garnished with parsley.

Yield: 4 servings.

Recipe: Winter Squash Pizza

Found this recipe in the NY Times food section. I'm not a pepperoni pizza type girl so I'm always looking for something new to put on top of my pizza pies.
Ingredients:
Yellow cornmeal to dust the pizza stone (or nonstick spray to grease the baking sheet)
1 pound fresh dough (from a pizza shop) or a frozen dough, thawed; or prebaked pizza crust
2 tablespoons olive oil
2 medium yellow onions, halved through the stem, then thinly sliced
3/4 cup frozen winter squash purée, thawed
2 teaspoons minced sage leaves or 1 teaspoon rubbed sage
1/4 teaspoon grated or ground nutmeg
1/4 teaspoon salt

1/4 teaspoon freshly ground black pepper
1 1/2 ounces Parmigiano-Reggiano or Grana Padano or pecorino, finely grated
1 tablespoon pine nuts

Preparation:
1. Preheat pizza stone or oven. If using a pizza stone, preheat it in the oven at 450 degrees Fahrenheit for 30 to 45 minutes; if using a pizza tray or a large baking sheet, preheat the oven to 450 degrees.

2. Prepare the crust. If you’re using fresh dough on a pizza stone, dust a pizza peel lightly with cornmeal. Add the dough and form it into a large circle by dimpling it with your fingertips. Pick it up and shape it by slowly turning it by its edge, stretching that edge all the while, until the circle is about 14 inches in diameter. Set it cornmeal side down on the peel.
To use fresh dough on a pizza tray or a large baking sheet, grease the tray or baking sheet lightly with nonstick spray. Lay the dough on the baking sheet and dimple it with your fingertips — then pull and press it until it forms a circle about 14 inches in diameter on the pizza tray or a 12-by-7-inch, somewhat irregular rectangle on the baking sheet. If you’re using a prebaked crust, place it on a cornmeal-dusted pizza peel or on a greased pizza tray or a large baking sheet.

3. Heat a large skillet over medium heat, then swirl in the oil. Add the onion slices, reduce the heat to very low, and cook, stirring often, until soft, golden and very sweet, 20 to 25 minutes.

4. Meanwhile, stir the squash purée, sage, nutmeg, salt and pepper in a medium bowl until uniform. Spread this mixture evenly over the prepared crust, leaving a 1/2-inch border at its edge.

5. Top with the caramelized onions, then sprinkle the finely grated cheese and pine nuts over the pie. Slide the pizza from the peel to the very hot stone, or place the pie on its tray or baking sheet with the pie either in the oven or on the section of the grill grate that’s not right over the heat source.

6. Bake or grill with the lid closed until the crust is golden and somewhat firm to the touch, perhaps even a little darkened on its bottom, 16 to 18 minutes. Check fresh dough occasionally to prick any air bubbles that may arise so you’ll have an even crust on the pie. Slip the peel back under the pie to get it off the stone, or set the pie on its tray or baking sheet with its pie on a wire rack. Cool for 5 minutes before slicing. If you want to make sure the crust stays crunchy, consider transferring the pie directly to the wire rack after a minute or so.

Recipe: Couscous Salad

I made this at Thanksgiving this year (my sister is vegan so I always try to find things she can eat too). It went over really well (minus my sister-in-laws mother who responded "couscous for Thanksgiving?"). I'm a huge fan of couscous - I could eat it plain for days and days but am always looking for ways to spruce it up a little.
Ingredients:
1 cup couscous, preferably whole wheat
Pinch of salt
2 large carrots, grated
1/2 cup chopped pecans
1/2 cup chopped dried cranberries
1/4 cup chopped scallions
1/4 cup olive oil, or more as needed
Grated zest and juice of 1 lemon, or more juice as needed
1 teaspoon coriander
Pinch of cayenne, or to taste
Black pepper
1/2 cup chopped fresh parsley
1 tablespoon chopped fresh sage, or 1 teaspoon dried

Preparation:

1. Put the couscous in a small pot and add 1 1/2 cups water and a pinch of salt. Bring the water to a boil, then cover and remove from the heat. Let steep for at least 10 minutes, or up to 20.

2. Put the slightly cooled couscous in a large salad bowl along with the carrots, pecans, cranberries, scallions, oil and lemon zest and juice, and sprinkle with the spices and salt and pepper. Use 2 big forks to combine, fluffing the couscous and tossing gently to separate the grains. (The salad can be made up to this point and refrigerated for up to a day; bring to room temperature before proceeding.)

3. Stir in the parsley and sage. Taste and adjust the seasoning, moisten with a little more oil and lemon juice as you like, and serve.

Yield: 4 servings.

Recipe: Grandma Angie's Crumb Cake

My Grandma Angie
I've been emailing back and forth lately with one of my aunts about family genealogy and such. She's found a number of old photographs that's she's scanned and emailed me, my great grandparent's in New Jersey and my great-great grandparent's back in Italy. 

We also have been talking food. That's one thing I connect most with my paternal grandmother. Food. Being the first generation born here in America she just embodied the "Italian Grandmother" stereotypes. Pleasant, smiling, loving on her grand babies, and always cooking. 

So my aunt has started to share and send me some of her recipes. I love to cook (as if a food blog wasn't evidence enough you now have a confession) and am glad to keep cooking the food that my grandmothers have cooked (both sides - Italian and German/English - are crazy-ass good cooks). 

So, of course, I wanted to share some with you. I haven't made this crumb cake myself (yet) but I do have vague memories of growing up and eating it with my Grandma Angie.

Grandma Angie's Crumb Cake*


*Note to any reader who tries this recipe. My grandmother didn't use recipes. She did everything from memory and knew what to add by heart. My family has tried years to recreate many of her recipes and after multiple tries have figured out the best measurement equivalents (i.e. How much does a "handful" of flour really measure out to?)


Mix the following ingredients
2 C flour
1 C sugar
1/2 C oil
2 tsp baking powder
1 C sour cream (my aunt said once she replaced this with strawberry yogurt and it was equally as good)
2 eggs
Dash of salt
sliced apples

Grease a baking pan - batter will be thick so you may need to spread to edges with a spatula.

Ingredients for topping:
1 1/2 C flour
1/2 C sugar
dash of salt
lots of cinnamon (I warned you about the measurements not being exact)
1 stick of butter, softened to room temperature

Grab a fist full and squeeze.
Break off large chunks and place all over top of cake.

Bake at 350* for 30-35 minutes or until golden.
Once cooled sprinkle with powdered sugar and serve.


I hope it works for you and I hope you love it.
Thanks Grandma Angie.

Friday, January 14, 2011

"Pasta in the Rough"

"Pasta in the Rough" by Mark Bittman

"Few people make fresh pasta at home, and it’s not difficult to see why. Who wouldn’t be put off by demonstrations that include piles of flour on cutting boards, or pasta-rolling machines spitting out six-foot ribbons of gorgeous dough? 

Fortunately, there is an easy way. A food processor makes quick work of the dough, and a rolling pin, which predates the pasta machine, still works (though a little practice with the machine can make life easier in the long run). And as for fancy shapes: why bother? The handkerchief (fazzoletti) shape — a rectangle or square, as you like — is as traditional as anything else, and as delicious.

The dough, in this case, is of the classic Emilia-Romagna style, loaded with eggs and therefore easy to handle, a lovely color and deliciously rich. You can form a well in the middle of a pile of flour, crack eggs into it and use a fork to slowly and painstakingly incorporate the flour into the eggs — but the food processor is faster. 

Now, however, you must wait, because if you don’t let the dough rest before rolling, it will resist your efforts. After a half-hour or so at room temperature (or longer in your refrigerator), it’ll be more pliable. You can then use a rolling pin (or a wine bottle) to roll the dough out until it is thin. Don’t worry about ragged edges. You cut the dough into squares — or rectangles or triangles or whatever — that are boiled until just tender. 

You can serve fazzoletti with nothing more than butter and Parmesan, or a drizzle of garlic-infused olive oil. Here, I use a super-rustic pesto, with crunchy bits of pine nuts in a sauce that’s rough, flavorful and lovable, just like the pasta" 


Monday, January 10, 2011

Sushi Overload

Happy New Year!

I spent part of my holiday break down in Oakland visiting a good friend of mine. During my week I went on what could only be considered a "I want to get mercury poisoning" sushi binge fest. 2 of the 5 nights I was there we went out for sushi. Now some of it was wonderful and some of it just didn't float my boat...as it were. 

The first place we went to neither of us had been before (we found a Groupon for the place so we figured why not). Their website recommended making reservations - so we did - although when we got there most of the bar was open and a number of tables so I don't think it was necessary (we went on a Thursday night). 

Pictures from Tachibana:

Maybe it was our reservations that got us the good view?
Seaweed salad. If it's on the menu I'm going to order it.
Where to even begin?
The top is a Caterpillar roll,
next (L to R) is Ana Kyu, Una Kyu and Uni,
then the bottom roll is some type of crunchy roll.
My dining companion's favorite - Cherry Blossom Roll
Somehow we managed to still be hungry
(and afterall we had a minimum we had to eat for the Groupon).
So we went the nigiri route.
(L to R) Halibut, Scallops, Yellow tale

Then Eel two ways. (L) Anago and (R) Unagi (my favorites)
Lately I've been in this "adventurous" eating mood. To quote Bizarre Food's Andrew Zimmern "If it looks good - eat it" and I have been.

So when I told my beau I was going out for sushi he asked if I was going to try Uni (Sea urchin and his favorite). My answer? 

Of course!

So from there began a long series of text messages with recommendations and suggestions (i.e. most of the nigiri platter above).

*     *     *

A few days later, with my sushi craving having not been satisfied, we went for round two. This time we had plans to visit a place with bottomless sake; unfortunately they were closed for the holidays. So we went a bit further down the road to another location.

I'd been to this sushi place before and while the food wasn't bad it also wasn't that impressive.

Photos from the "other" sushi bar:

They called this a "crispy roll" (crab and avocado) however it was more like a deep fried sushi doughnut. Not what I expected. I thought at most they'd have seared the outside rice but this had a batter coated around the sushi individually cut sushi pieces and then deep friend. More than I could handle.
Being her favorite we went ahead and ordered a Cherry Blossom Roll from this establishment. It was fine - but I think I preferred the Tachibana's
So here we have a roll named after the sushi bar...tempura shrimp on the inside with unagi and avocado on the top. Something wasn't right with the first bite. It left a soapy taste in my mouth - like when a cup or fork isn't rinsed properly. 

So I tried another piece....no soap taste...but there it was on the third...it was driving me crazy!

So I dissected my last bite. First I ate the shrimp and rice...tasted fine. Then I tried the avocado...nothing wrong. Last bite was the unagi! Yep, there it is. Something wasn't right. Complete sadness. My favorite piece and it was tainted! 


Even though I had a tainted taste in my mouth from the last roll we still were looking for something a little more. So my dining companion ordered a "49er Roll". Thank goodness for a fresh and slightly sweet salmon on top.

The last roll we tried was (sort of) recommended by my significant other. He suggested I try a Salmon Skin Hand roll. Well being me I forgot the "Hand roll" part and got it in a Maki roll instead. The salmon skin was hard to taste at first but gave a nice salty aftertaste to the roll. I picked apart one to try the salmon skin by itself and I loved it...maybe next time I'll remember to get it as a hand roll instead.

In the end, while mercury poisoning did not occur, I satisfied my sushi craving for the moment.
Related Posts Plugin for WordPress, Blogger...